Thursday, December 26, 2013

Carrot Cookies with Orange Glaze

Certain foods are an instant reminder of the holidays. For me, this cookies are the epitome of Christmas. My mom always made these when I was a kid and the recipe was passed down from her side of the family. Every time I make them, I'm always surprised how good they are! I usually make a bit of extra glaze because I love to cover these pretty generously.


Cookie Batter:
1 C shortening
3/4 C sugar
1 C cooked, mashed carrots
2 eggs
1 t vanilla
2 T milk
2 C flour
2 t baking powder
1/2 t salt
3/4 C coconut

Orange Frosting:
4 1/2 C powdered sugar
1/2 C softened butter
4 T fresh squeezed orange juice
Grated orange rind from one orange


1. Boil 8 oz of carrots. (Baby carrots work great.) Drain and mash with a potato masher. Set aside to cool.

2. In a large bowl, beat one cup of shortening on low. Slowly add in 3/4 cups of sugar and beat on medium high until blended. One at a time, add the carrots, egg and vanilla. Blend each ingredient with the beaters until evenly mixed. 

3. Mix together flour, baking powder and salt, then sift into bowl stirring into batter. Add in coconut, folding into batter.

4. When completely mixed together, drop teaspoon sized balls onto a greased cookie sheet. 

5. Bake at 350 degrees for 12 - 15 minutes or until cookies are rounded and bottoms are browned. Cool on a wire rack.

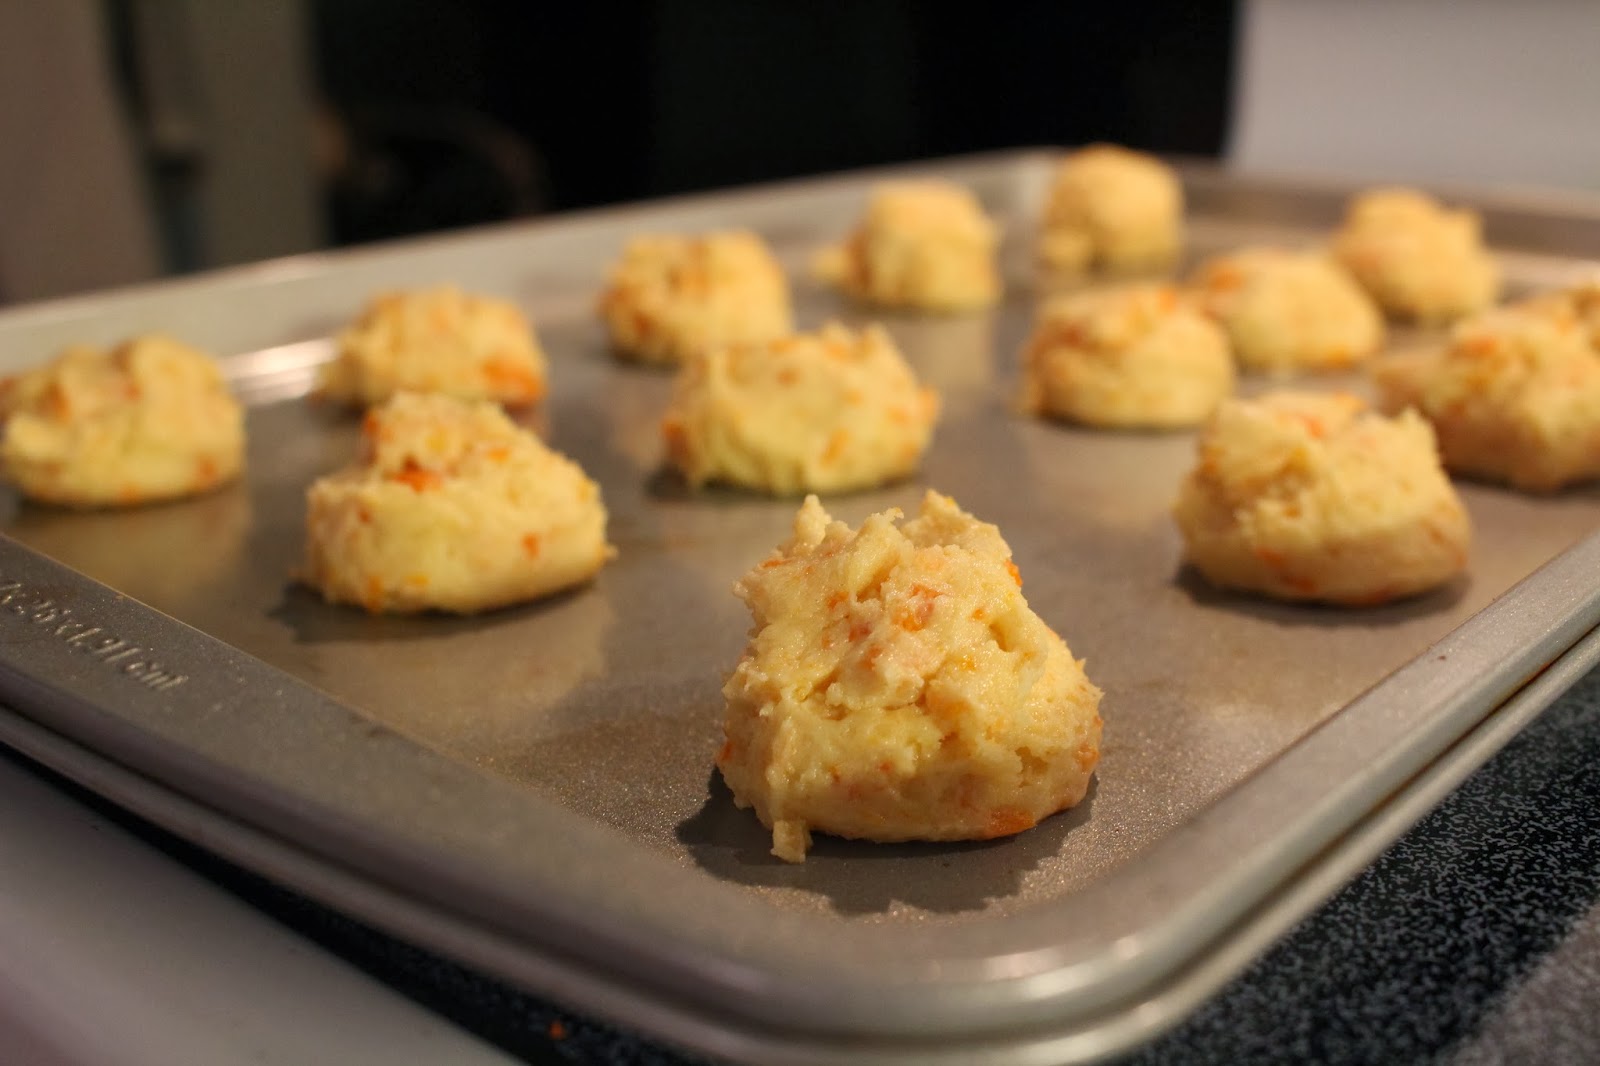
6. Beat together ingredients for the orange glaze on medium speed. Consistency should be creamy but loose. Spread glaze over each cookie and let harden. Store in an air tight container for up to two weeks.

Enjoy!

Sunday, December 22, 2013

Salted Caramel Candy

Who doesn't love a delicious chewy caramel? Sweet and salty, these treats are great gifts and staples for the Holidays. I'm not going to convince you they are easy, but if you follow the tips below, you'll become a caramel making machine! Watch out, these are highly addictive.

1 C sugar
1/4 C room temp water
1 C cream
3 T butter
1 vanilla bean halved and scraped
1 t fleur de sel (sea salt)
1 t vanilla
candy thermometer
8x6 or 7x5 glass dish
parchment paper
wisk

TIP #1: Prep everything beforehand. The timing of each step is essential to successfully making caramel. Follow the below process exactly.

1. Line your glass pan with parchment paper. very lightly butter the parchment paper and set aside.


2. In a small sauce pan, melt 3 T butter over medium heat. Add 1 cup of cream, halved and scraped vanilla bean and 1 teaspoons fleur de sel. Stir to dissolve salt. Wait for mixture to simmer, then remove from heat and pour into a measuring cup. Set this mixture aside for later.

TIP #2: For the next step, use a medium size sauce pan with high sides and a heavy bottom. Non stick pans should NOT be used.

3. Combine the 1/4 cup of room temperature water and 1 C sugar. Stir until mixed evenly. Turn burner to medium. Run warm water over end of candy thermometer and insert into sugar mixture. From this point on, DO NOT STIR this mixture and don't make any adjustments to the pan or the heat. All of this can cause the sugar to seize and your batch will be ruined. If needed you can gently swirl the pan on the burner, but I try to avoid this.

4. Closely watch the candy thermometer. As soon as it registers 320 degrees, slide the pan off the heat. Slowly drizzle the cream mixture into the hot sugar while wisking continuously. The sugar mixture will bubble up, but continue to stir consistently until all the cream is incorporated. I usually leave the candy thermometer in the mixture and stir around it.


5. Slide the pan back onto the burner (which is still set to medium heat) and continue to cook this mixture. It will bubble up again and then remain at a rolling bubble.

6. When the candy thermometer reads between 240-248 degrees, remove the pan from the heat and immediately (and carefully) pour the caramel into the parchment paper lined glass dish.

TIP #3: The final temperature is what dictates the texture of the caramel. The lower end of the spectrum yields a very soft chewy caramel while the higher end gives you a very firm consistency like a sugar daddy.

7. Let caramel cool to room temperature. Then lift the parchment paper out and chop candy into squares.


8. Wrap each square individually and enjoy!


Thursday, December 12, 2013

Twice Baked Potato


4 large russet potatoes (approx 3/4 lbs)
Olive oil
3/4 stick of butter (unsalted), softened
8oz sour cream
1/4 C milk
2 C Sargento sharp white cheddar cheese
Chopped chives or green onion
Salt and Pepper to taste

Preheat oven to 400 degrees

Wash and dry potatoes

Place on baking sheet and poke holes all over with a fork

Rub each potato with olive oil

Bake at 400 degrees for 1 hour 10 minutes

Remove from oven. Holding potato in a dish towel (they are scorching hot!) cut in half. Scoop middle out of each potato half with a spoon and place in a mixing bowl.

Place hollowed potato skins back in the oven while you make the filling.

Add 3/4 stick of butter softened and chopped into small "pads" of butter to the potato mixture. Mash with a potato masher.

Add 8oz sour cream (light works too!), 1/4 C milk, 1 C cheddar, chopped chives or green onion plus salt and pepper to taste.

Remove potatoes from the oven and fill each with the potato mixture. Top with remaining cheddar cheese and place back in the oven and cook for 20 more minutes. Garnish with chives or green onions.

Enjoy!


Friday, November 15, 2013

White Corn Casserole

Here's a brand new recipe I created for corn casserole. This is a great side for a southern meal or holiday. And isn't everything better with bacon? I think so! Read on for directions to make this easy, delicious recipe.

8 slices of bacon, crumbled
2 t of bacon grease
1 T of butter
1/2 white onion, chopped
4 cans of white corn, drained
1 can of creamed corn
3/4 C cream (heavy best)
3/4 C milk
3 T grits
1/4 t cayenne 
1/8 t smoked paprika (optional)
Salt and Pepper to taste
1 C sharp white cheddar
1/2 C scallions, chopped

1. Cook bacon strips on medium heat in two batches until crisp. Drain on paper towels. Reserve 2 tablespoons of bacon grease. Start preheating oven to 350 degrees. Butter a 13x9 glass dish and set aside.

2. In a dutch oven, warm 2 teaspoons of bacon grease and 2 tablespoons of butter over medium high heat until lightly bubbling. Add chopped onion and cook approx 6 minutes until softened and just starting to turn golden. 

3. Add white corn to pot and saute for 3 minutes. Then add creamed corn and saute an additional 2 minutes.

4. Add cream and milk to the pot and turn heat to high. Boil for a few minutes until mixture thickens slightly. Then slowly add 3 tablespoons of grits stirring constantly. Also add cayenne, smoked paprika (if desired), salt and pepper. 

5. Remove pot from heat and stir in crumbled bacon, 1 C Sharp white cheddar and 1/2 C scallions. Pour mixture into buttered 13x9 glass pan. 

6. Place in 350 degree oven for 25 minutes. Let sit for 5 minutes before serving. 

Once the mixture is created, you could let cool and store in the refrigerator for up to 24 hours. Take out and let warm to room temperature before baking. You could also add breadcrumbs to the top before baking for an extra crunch. 

Enjoy!

Thursday, October 17, 2013

Spinach & Artichoke Dip

Rich and delicious - this dip is a staple for football Sundays every fall. This one is best served in a sourdough or rye bread bowl. We also usually put out chips and veggies or sub the bread for pita - it goes great on everything! The recent favorite accompaniment is Middle Eastern flatbread from Trader Joe's warmed in the microwave or oven. The recipe feeds a crowd so for a smaller party, cut in half!

4 cans quartered artichokes, drained and chopped
1 10 oz package frozen spinach, thawed and patted dry
1 1/3 C grated Romano cheese (sub for parmesan)
2 8 oz containers of cream cheese
2 cloves of garlic, minced
2 C mayo

1. Preheat oven to 325 degrees.

2. Mix all ingredients together and spread in a 13x9 glass or ceramic baking dish.

3. Bake uncovered at 325 degrees for 30-45 minutes, or until bubbling.

4. Let rest 5 minutes before serving.

Can be prepared ahead of time and kept in the fridge until ready to bake. Serve hot with your choice of sides. 


Thursday, August 29, 2013

Mac & Cheese

This dish is special and a real crowd pleaser. With a little extra time to go the homemade route rather than straight from a box, you can blow away your family and friends. This easy Mac & Cheese recipe is so far the most requested dish Brian and I have ever made. Originally based on one of Martha's recipes, we've taken the basics and made it our own - you may want to do the same as it's really pretty customizable. This dish was also a great excuse to invest in new kitchen tools... If you don't already have a microplane for grating cheese, consider getting one. Makes this recipe go so much quicker! Well without further ado, here's our delicious version of Mac & Cheese.

Topping:
3 T unsalted butter, melted
1 1/2 C bread crumbs
1 C Vermont white cheddar (Sargento)


Ingredients:
5 1/2 C milk
6 T flour
6 T salted butter
4 C Vermont white cheddar (Sargento)
1 Block fontina (Approx. 0.5-0.7 oz)
8 pieces of Land o'Lakes american cheese
1/4 t pepper
2 t kosher salt
1/4 t nutmeg
1/2 t Italian seasoning
1/4 t smoked paprika (strongly suggested)

1. First put pasta water on to boil. Cook 1 lb elbow pasta 1 minute less than recommended on package. Once cooked, strain and rinse with cold water until pasta is cool. While you are waiting for the pot to boil or pasta to cook, grate your block of fontina cheese and set aside.

2. Melt 3 T butter in a fry pan. Add 1 1/2 cups of bread crumbs to the melted butter and set aside. Measure out spices and set aside.


3. In a small sauce pan, warm 3 1/2 cups of milk. You just want to take the chill out of it, not boil it! Put the remaining 2 Cups of milk in a Tupperware container with the 6 T of flour and shake it together. Once no lumps are seen, add this to the rest of the warming milk.

4. In a separate (larger) pan, slowly melt butter. Add milk/flour mixture to this pan and turn heat up to high. Wisk vigorously until mixture comes to a full boil. Make sure this gets to a thick gravy consistency - if not there by the time it boils, cook a few more minutes.


5. Add salt, pepper and all the spices. (This part if customizable so if you prefer a different blend of ingredients, here's one of the areas you can customize.) Stir in spices and then slowly add all the cheese stirring constantly until completely blended. The cheese combination is also customizable. Jarlsberg is a great sub for Fontina giving a bit more of a bite. We haven't tried yet, but regular or smoked gouda is a sub for the Fontina as well. Experiment to find your favorite blend.

6. Combine pasta into the cheese mixture. Stir gently so as not to break the pasta apart. This should appear very soupy looking. Let mixture sit while you pre heat oven to broil. Mixture can also be set aside until ready to serve.


7. Pour Mac & Cheese into a 13x9 pan. Top with 1 cup of cheddar cheese and bread crumb mixture. Broil until bread crumbs brown approx. 5 minutes. (NOTE: if you don't like a saucier mac and cheese, bake for 25 minutes on 350 rather than broil topping. If you choose to do this, brown bread crumbs in the fry pan when you combine with the butter.)

As you can see, lots of ways to do this, but now you have the way we love it! I couldn't get a shot of the finished product before everyone dug in, so here's a half eaten one :)


ENJOY!


Friday, August 9, 2013

Sausage Breakfast Casserole

My favorite meal is breakfast and I will eat it for ANY meal. I find it hard to cook when company comes over since its such a "made to order" meal but I found this breakfast casserole which is very simple to make and with a few tweaks to the original recipe, absolutely delicious. It's turned into a tradition to make this for Christmas day because it can cook while we open presents and can feed a large group of people. I don't recommend making it the night before but you can prep a few things to make throwing the dish together super easy.


2 16oz packages of sausage (I use Jimmy Dean Regular)
1 white or sweet onion, copped
1 extra large green pepper, chopped
3 C frozen shredded hash browns (Ore Ida is best)
3 C cheddar cheese divided
1 C bisquick mix
2 C milk
8 eggs
Salt & Pepper to taste
13x9 baking dish

1. Pre-heat oven to 400 degrees. Saute peppers, onions and sausage over medium high heat until sausage is no longer pink, but not fully cooked. (This you can do the night before to save time. Just take out of the fridge in the morning and let warm to room temperature before proceeding.)
2. Drain sausage mixture and put into a greased 13x9 baking dish. Add 3 C frozen shredded hash browns and 2 C cheddar cheese. Mix in the pan until blended well.
3. In a separate bowl, wisk 1 C bisquick with 2 C milk and 8 eggs. Add salt and pepper to taste.
4. Pour bisquick mixture over the ingredients in the baking dish, coating evenly.
5. Bake at 400 degrees for 40 minutes or until top starts to brown and a knife comes out clean from the middle.
6. Top with remaining 1 C of cheddar cheese and put back in the oven for 1-2 minutes to melt.
7. Let sit for 5 minutes, cut and serve. Feeds 12-15.


Breakfast for lunch anyone? Enjoy!


Wednesday, August 7, 2013

Banana Bread from Grandma Rose's Kitchen

This recipe has been passed down from my Grandma Rose. It's a special recipe to me because have vivid memories of her making this with me when I was a kid. My mom also made it a lot and I've never had a better banana bread. I think the secret ingredient is the soured milk which I haven't seen in any other recipe. Hope you enjoy!

1 T lemon juice
1/4 C milk
2 C flour
1 1/2 C sugar
1/4 t baking powder
1/2 t salt
3/4 t baking soda
1 t vanilla
2 eggs
1 stick of butter or margarine, melted and cooled
2 large or 3 medium bananas (old brown ones are best!)
3/4 C nuts (optional)
1 T shortening
1 T flour
Extra long loaf pan

1. Preheat oven to 350 degrees. Grease loaf pan with 1 T shortening, then use 1 T flour to coat entire pan. I use an extra long loaf pan that used to belong to my Grandma Rose, but a regular loaf pan will work too.

2.  Melt 1 stick of butter and set aside to cool. 

3. Add 1 T lemon juice to 1/4 C milk and stir -- set aside.

4. Peel bananas and mash with a banana masher or fork until chunks are pea sized.

5. Blend together 2 C flour, 1 1/2 C sugar, 1/4 t baking powder, 1/2 t salt and 3/4 t baking soda.

6. Add 1 t vanilla, 2 eggs and butter to dry mixture and blend ingredients together. Then add in banana mixture and mix well. Pour batter into pan.

7. Bake at 350 degrees for 50 - 60 minutes. Bread is cooked when lightly browned on top and a toothpick stuck in the center comes out clean.

Don't forget to have a slice while it's still warm from the oven -- that's one of our traditions too!


Wednesday, July 31, 2013

Homemade Hard Lemonade

There's nothing better in the summer than a refreshing glass of lemonade. So why not spice it up? Some vodka and fresh herbs turn this classic drink into a modern, easy to make cocktail. Prep ahead of any BBQ or special occasion and refrigerate to let the flavors marinate overnight.


2 C freshly squeezed lemon juice (approx. 8 large lemons)
1 1/2 tbsp freshly minced basil or mint
1 1/2 C vodka (more or less based on taste)
2 C Simple Syrup divided
5 C water

Garnish: 
1 lemon sliced into pinwheels
mint or basil leaves

1. Make simple syrup first. Mix 1 C of granulated sugar and 1 C of warm water in a saucepan. Set to high heat. When the mixture comes to a boil remove from the burner and let cool. Consider making ahead of time to avoid waiting for the mixture to cool - must be room temperature before using.

2. Mince fresh basil or mint and set aside. (Best if you use a food processor to get very fine pieces.)

3. Juice lemons and pour liquid into a 10 cup or larger pitcher.

4. Add 1 C of simple syrup, minced basil or mint and 1 1/2 C vodka.

5. Top with 5 C of water and stir.

6. Put pitcher in the fridge overnight if there's time - I think it tastes better the next day! Or serve immediately over ice. Use the remaining simple syrup to add a little extra sweet if desired. Garnish each glass with a lemon pinwheel and a sprig of basil or mint!

Lemonade is subjective so feel free to play with the ratios. If you make this in a gallon pitcher you'll have some extra room for more vodka, water or simple syrup depending on your tastes.

TIP: Simple syrup is a great way to infuse flavors into the lemonade. To enhance the basil or mint flavors of this drink, boil some leaves in the simple syrup when cooking it. Let leaves sit in the mixture while cooling to fully infuse. Strain leaves out before adding simple syrup to the pitcher. Other alternate flavors that pair well with this drink are lavender or rosemary. For these boil both the stem and the leaves in the simple syrup and strain once the mixture is cool.

Basil Lemonade

Party Sized
To create a batch large enough for a party, use the below ingredient list. This fits in my 3 gallon drink dispenser pictured above.

9 C lemon juice (Approx 36 large lemons - definitely use a juicer!)
1 large bunch of fresh basil or mint
1 handle of vodka (I use ketel one)
6 C simple syrup divided
Water to fill 

Garnish:
Top with coarsely chopped mint or basil and lemon pinwheels

Follow above directions using approx 4 - 5 C simple syrup based on preference. Use rest on the side to taste. Have lemon pinwheels and extra mint or basil leaves on the side for garnish. Serve on a hot day and it will go fast!


Thursday, July 25, 2013

Grilled Beer Can Chicken & Bourbon Butter Glaze

This is the first meal my boyfriend cooked for me when we started dating. I think he had me at first bite! The rub and the glaze are an amazing combination, totally worth all the effort it takes to make. Before attempting this one, head to your local Christmas Tree Shops or Target and grab a Beer Can Chicken stand that allows the chicken to stand up on the grill over the can.


Approx. 4 lb chicken
3 tsp rub (recipe below)
1 can of coke
Bourbon Glaze
Beer Can Chicken Stand

Rub Ingredients:
2 tsp smoke paprika
2 tsp kosher salt
1 tbsp sugar
1/2 tsp freshly ground pepper
1/2 tsp cumin
1 tsp garlic powder
1/2 tsp chile powder
1/2 tsp cayenne pepper

Bourbon Butter Glaze
6 oz butter (cut into small pieces)
1/4 C brown sugar
2 tbsp bourbon
1/2 lemon (juiced)
1 tsp kosher salt
1/2 tsp freshly ground pepper

1. Remove gizzards then wash and dry chicken. 

2. Combine ingredients for rub and mix well. 

3. Open coke and pour out 1/4 of the coke. (We use coke instead of beer because it adds great caramel flavor to the chicken, but beer works too!) Using a knife or can opener, cut off top of can carefully. Add 1 tbsp of the rub to the remaining coke in the can. Place can in the beer can chicken stand.

4. Place chicken on the stand, sliding the opening of the cavity over the can so its standing up. Rub entire chicken with rub and set aside. 

5. Pre-heat grill to medium high heat. 

6. In a small sauce pan, melt the butter for the glaze and then add the rest of the ingredients. Boil for two minutes stirring vigorously with a wisk. 

7. Cook chicken on the grill over direct heat one hour basting every 10-15 minutes with bourbon butter glaze. Wait until chicken reaches 175 degrees in the thigh. Remove from the grill and let sit 10 minutes. 

Bon Appetit!